Hexagon LED lights can transform a plain ceiling into a clean, geometric feature. Their connected honeycomb pattern creates even illumination for garages, gaming rooms, studios, and modern workspaces. However, installation requires more than arranging attractive shapes. Safe wiring, accurate spacing, and strong mounting support all matter.
This guide explains how to install hexagon led lights on ceiling with practical steps from planning to final testing. You will learn how to measure the ceiling, choose a suitable layout, prepare the surface, connect the lighting system, and secure each module. A tape measure, level, pencil, ladder, compatible power supply, and insulated tools are helpful. Turn off the circuit breaker before touching electrical connections. Never rely only on a wall switch.
Begin with a paper or floor layout. It helps reveal awkward gaps near walls and fixtures. Many first-time installers focus on appearance and overlook cable routing. That mistake can create visible wires or uneven pressure on the connectors. Check the manufacturer’s voltage, connector direction, load capacity, and mounting instructions before assembly. If the wiring appears unfamiliar, consult a qualified electrician. It is better to pause than guess.
Ceilings are rarely perfectly flat. Small differences may affect alignment. Adhesive alone may also fail on dusty, textured, or damp surfaces. Clean the area carefully and consider appropriate clips or screws when approved by the product instructions. Test the lights before final mounting. A little patience here can prevent removing the entire pattern later. The finished installation should look balanced, feel secure, and provide comfortable light without flicker.
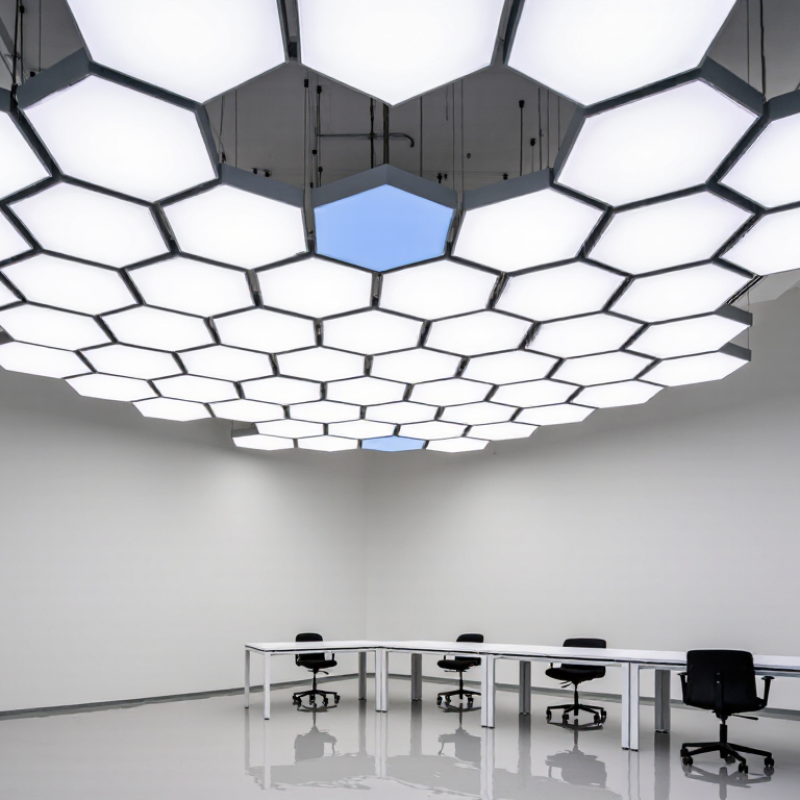
Installing hexagon LED lights safely begins with the right tools and materials. You will need a tape measure, pencil, level, drill, suitable drill bits, screwdriver, wire stripper, and voltage tester. Keep a stable ladder nearby. Wear safety glasses when drilling overhead.
Prepare the lighting panels, connector cables, mounting clips, screws, and ceiling anchors. Use anchors designed for your ceiling type. Drywall, concrete, and wood require different fasteners. A junction box may be necessary for fixed wiring. Check the light’s instructions before buying extra cable or connectors. Small errors here can create loose panels later.
Turn off the circuit breaker before touching existing wires. Confirm the power is off with a voltage tester. This step is easy to rush, but it deserves patience. A level helps keep each hexagon aligned, while masking tape can mark the layout temporarily. Leave enough space around the pattern for ventilation and future maintenance. Connectors should sit firmly without sharp bends or exposed copper. If the wiring arrangement seems unclear, ask a qualified electrician to inspect it. Local electrical rules can differ, and online advice may not cover your ceiling. My checklist is not perfect, so I recheck measurements before drilling. A slightly uneven first panel can affect the entire pattern.
Planning the layout is the most important part of installing hexagon LED lights. A balanced pattern looks intentional, while small spacing errors become obvious overhead. Measure the ceiling’s length and width, then locate the visual center of the room. Consider furniture, ceiling fans, beams, and existing light points before drawing anything.
Create one full-size hexagon template from cardboard. Place it on the floor and test several arrangements around the central point. Keep the gaps consistent, usually between 2 and 5 centimeters, depending on the lighting system. My first layout looked attractive on paper but crowded the ceiling fan, so I shifted the pattern toward the seating area. That adjustment was better, although not perfectly symmetrical. Real rooms rarely are.
Use a laser level or chalk line to mark a straight centerline across the ceiling. Add a second line at a right angle to form a crosshair. Transfer the template’s corners onto the ceiling with removable painter’s tape, not permanent ink. Step back often and check the pattern from the doorway and main seating position. Mark the cable route and power connection separately. Avoid drilling near hidden wiring, plumbing, or structural supports. Turn off power before inspecting any electrical point, and ask a qualified electrician to handle connections when required. Leave enough clearance around sprinklers, vents, and access panels. A dry layout test with the actual light pieces can reveal uneven spacing before installation begins.
| Planning Item | Recommended Value or Example | How to Calculate or Mark It | Installation Purpose |
|---|---|---|---|
| Room size | 4.00 m × 3.00 m; ceiling area = 12.00 m² | Measure the finished ceiling length and width at several points. Use the smallest confirmed dimensions if the walls are not perfectly parallel. | Provides the reference area for layout symmetry, clearance, and cable planning. |
| Typical ceiling height | 2.40–2.70 m for residential rooms; 2.70–3.20 m for many workspaces | Measure from the finished floor to the finished ceiling, especially where ladders or access equipment will be used. | Helps determine viewing balance, light distribution, and safe installation access. |
| Panel planning size | Use the actual manufacturer specification; example planning size: 300 mm across flats per hexagon | Measure one assembled hexagon from one flat side directly across to the opposite flat side. Do not estimate from the packaging. | Creates an accurate full-scale ceiling template before adhesive or clips are installed. |
| Recommended panel gap | 5–15 mm between adjacent hexagon modules, unless the installation instructions specify otherwise | Choose one gap value and keep it consistent. Mark the gap with a spacer or a short piece of rigid card. | Maintains a uniform visual pattern and leaves room for connectors or joining pieces. |
| Perimeter clearance | At least 100–150 mm from walls, coving, vents, smoke detectors, and light fittings | Draw a clearance rectangle or outline on the ceiling before placing the first hexagon. | Prevents a crowded edge appearance and reduces conflicts with existing ceiling features. |
| Centerline position | For a 4.00 m × 3.00 m room: center point at 2.00 m from each long wall and 1.50 m from each short wall | Measure each wall, mark its midpoint, and connect opposite midpoints with two light pencil or chalk lines. | Creates a reliable starting reference for a centered and balanced layout. |
| Example layout quantity | A compact 7-hexagon cluster for a small room; a larger room may use 10–20 or more modules | Lay the modules on the floor first and count complete hexagons, connector positions, and any partial edge arrangement. | Allows the design to be checked without drilling or bonding components to the ceiling. |
| Marking sequence | Center point → main axes → first hexagon → adjacent hexagons → cable route | Use a laser level, chalk line, or removable painter’s tape. Mark only light reference lines on finished surfaces. | Reduces cumulative alignment errors as the hexagon pattern expands. |
| Power connection location | Place the power entry near the first or central module, while keeping the driver accessible | Confirm the nearest approved electrical connection point and measure the cable route before fixing panels. | Minimizes visible cable length and avoids repositioning installed modules. |
| Ceiling checks before marking | Check for joists, pipes, ducting, recessed wiring, sprinklers, and fire alarms | Use building drawings, a suitable detector, or a qualified electrician where concealed services may be present. | Reduces the risk of drilling into concealed services or blocking required equipment. |
| Final alignment tolerance | Keep adjacent module edges within approximately 2–3 mm of the planned line | View the layout from several angles before permanent fixing; correct the first module if later modules begin to drift. | Produces straight rows, consistent gaps, and a professional finished appearance. |
Planning note: Panel dimensions, connector spacing, mounting method, electrical load, and required clearances vary by product. Verify the actual installation instructions and local electrical requirements before fixing or wiring the lights.
Before installing hexagon LED lights, inspect the ceiling carefully. It should be clean, dry, firm, and free from peeling paint. Dust can weaken adhesive and cause panels to shift later. Turn off power at the circuit breaker before handling wiring. Use a voltage tester to confirm the circuit is dead. Do not rely on the wall switch alone.
Measure the ceiling and mark a light centerline with a pencil or chalk line. Arrange the hexagons on the floor first, leaving consistent gaps between each panel. This small step prevents an uneven pattern above your head. Hold the layout against the ceiling with temporary tape. Check the viewing angle from the room entrance. I once trusted a quick measurement and found the final panel sat too close to a cabinet. It looked acceptable, but not professional.
Choose mounting hardware for the ceiling material. Plasterboard may need suitable anchors, while solid concrete requires drilled plugs. Use the supplied template, or make a cardboard guide for accurate spacing. Attach brackets or adhesive pads only after cleaning the surface with a suitable, residue-free cleaner. Keep cables hidden, gently bent, and away from sharp edges. A level helps maintain straight joints across the pattern. Avoid pressing panels into place before checking alignment. Small corrections become difficult afterward. If the ceiling feels weak or wiring is unclear, stop and consult a qualified electrician. Safety matters more than a perfect shape.
Installing hexagon LED lights on a ceiling requires careful power planning, not just accurate positioning. I begin by switching off the circuit breaker and confirming that no voltage is present. The ceiling surface should be dry, firm, and free from dust. I arrange the light panels on the floor first, checking the connectors and cable lengths. This simple step prevents awkward gaps above my head.
The power supply must match the light system’s required voltage, wattage, and connector type. I connect the main input only after checking the wiring diagram and securing every terminal. Live wiring should be handled by a qualified electrician, especially when connecting to household circuits. Keep cables away from sharp edges and never leave copper exposed. Do not guess.
I restore power briefly and test each panel, connector, and brightness setting. The lights should start evenly without flickering, buzzing, or unusual heat. If one section stays dark, I switch the breaker off again before checking its connection. I once overlooked a loose connector because the panel looked properly aligned. It was a useful mistake. Test slowly, and inspect the power supply after several minutes of operation. Local electrical requirements should always guide the final connection.
This chart shows the calculated electrical load as six 12-watt LED modules are connected to a 24-volt DC power supply. Total power increases by 12 watts per module, while the required current is calculated as total power divided by 24 volts. Verify the actual voltage, current, polarity, and connector temperature before completing the ceiling installation.
Before mounting hexagon LED lights, switch off the circuit breaker and verify the wires with a voltage tester. Do not rely on the wall switch alone. Dry hands matter. I also recommend photographing the ceiling layout before drilling. This simple step helps reveal joists, pipes, and existing cables. Mark every fixing point with a pencil, then confirm the spacing from the floor. A clean layout reduces tension on the connectors and prevents uneven light patterns.
The ceiling must support the combined weight of the panels, frames, and fasteners. Use suitable anchors for concrete, timber, or plasterboard ceilings. Never use the same fixing method for every surface. Secure each section firmly, but avoid crushing plastic clips or bending the frame. Route cables neatly through approved channels, leaving no loose conductors above the panels. Connections should be insulated, enclosed, and accessible for future inspection. If the wiring is unfamiliar, ask a qualified electrician to complete it.
Check that the lights sit flat. Look closely for gaps, tilted corners, or warm connectors after a short test. Turn power off again before touching anything. The first test should last only a few minutes. Watch for flickering, unusual noise, burning smells, or excessive heat. Stop immediately if any appear. I once underestimated how easily a small ceiling irregularity could distort an entire pattern. Rechecking the surface is not wasted effort. It is part of safe installation. Keep the area dry, maintain ventilation, and follow the applicable electrical requirements in your location.
Prepare a tape measure, pencil, level, drill, suitable bits, screwdriver, wire stripper, and voltage tester. Keep a stable ladder nearby. Wear safety glasses when drilling overhead.
Mark the pattern with masking tape before drilling. Check spacing from the floor and leave room for ventilation. Photograph the ceiling to locate joists, pipes, and existing cables.
No. Drywall, concrete, and wood need different anchors and screws. Match each fastener to the ceiling material. A weak anchor can loosen the entire pattern.
Use a level while positioning each panel. Mark every fixing point carefully. Keep connectors firmly seated without sharp bends or exposed copper. One uneven panel can distort the whole design.
Turn off the circuit breaker. Do not rely only on the wall switch. Confirm the circuit is dead with a voltage tester. Keep your hands dry.
Ask a qualified electrician if the wiring arrangement seems unclear. Fixed wiring may require a junction box. Local electrical requirements can differ. Online guidance may not cover your ceiling.
Route cables through approved channels. Leave no loose conductors above the panels. Keep connections insulated, enclosed, and accessible for inspection. Do not crush clips or bend the frame.
Test the lights for only a few minutes. Check for flat panels, gaps, tilted corners, warm connectors, flickering, noise, burning smells, or excessive heat. Stop immediately if anything seems unusual. My checklist is not perfect, so I recheck the measurements.
This guide explains how to install hexagon led lights on ceiling in a clear and practical way. It begins with the essential tools and materials, such as measuring equipment, mounting hardware, suitable cables, and safety gear. The installation process then focuses on planning the hexagon layout, measuring the ceiling carefully, and marking each panel position to create an even and attractive pattern.
Next, the ceiling is prepared, and the LED panels are mounted securely according to the planned design. The power supply is connected carefully, with all electrical work handled safely and in accordance with local requirements. After powering on the system, each light and connection should be tested to confirm proper operation. Finally, the guide covers securing loose components, checking cable placement, inspecting the mounting points, and completing a thorough safety review before using the finished ceiling light system.
Xolle Light