Vehicle inspection lighting affects more than visibility. It influences defect detection, technician fatigue, and inspection consistency. A clean workshop bay can still produce misleading shadows around wheel arches, door seams, and engine components. This raises a practical question: what is the ideal lux level for vehicle inspection lighting? The answer is rarely one universal number. Required illumination depends on the inspection task, vehicle surface, lamp position, background reflectance, and local workplace guidance.
In real inspection areas, technicians need steady, evenly distributed light rather than intense brightness alone. A calibrated lux meter can reveal dark zones beneath a chassis or glare across a polished bonnet. Portable LED fixtures may appear powerful, yet poor beam angles can hide scratches and uneven paint. Color rendering also matters. High-quality light helps distinguish oil residue, corrosion, dents, and subtle color differences. Lux is only part of the assessment.
Standards should guide the design.
However, practical verification remains essential. Lighting engineers and workshop managers should measure illumination at working height, across inspection lanes, and during normal operating conditions. They should also check flicker, glare, shadows, and emergency visibility. A target level that works for exterior checks may feel inadequate inside a cabin or wheel well. That detail is easy to overlook. This article examines suitable lux ranges, measurement methods, fixture placement, and common design mistakes for modern vehicle inspection facilities in 2026. It also questions whether chasing a higher lux reading always improves accuracy. Often, it does not.
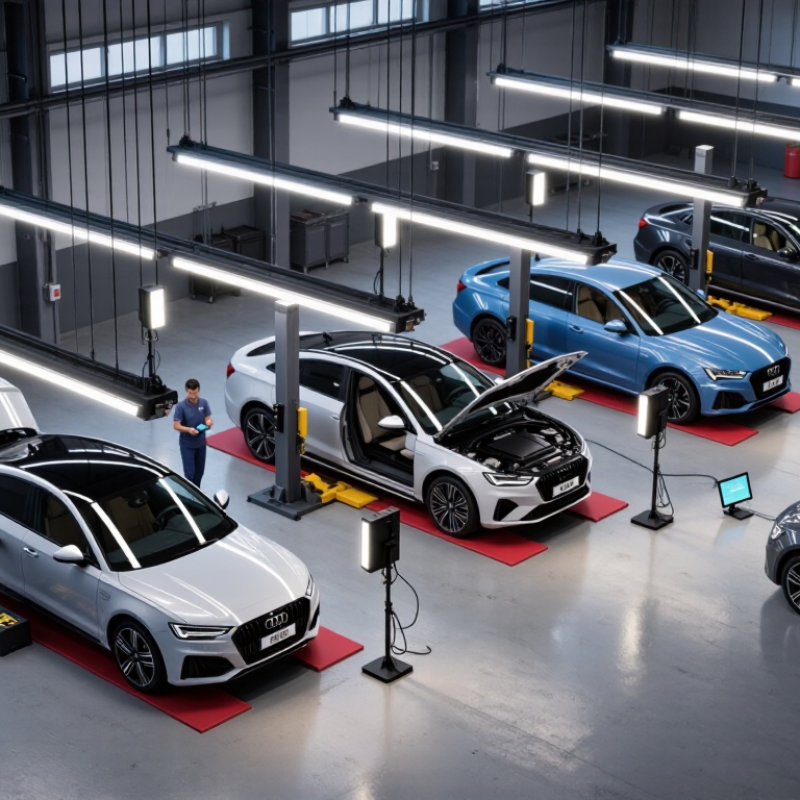
How to Find Ideal Lux for Vehicle Inspection Lighting?
Understanding lux requirements for vehicle inspection lighting begins with the inspection task. Lux measures light reaching a surface, not the lamp’s advertised output. EN 12464-1:2021 commonly places general vehicle-repair work near 500 lux. Finer inspection tasks may need 750 lux or more. These levels help reveal dents, uneven paint, oil traces, and small surface defects.
Measure lux at the vehicle’s inspection surface. Check the hood, doors, lower panels, and underbody separately. A calibrated lux meter gives more reliable results than visual judgment. The IES Lighting Handbook recommends evaluating illuminance, uniformity, glare, and color quality together. A bright ceiling does not guarantee a bright door panel. Shadows can hide defects.
Uniformity matters greatly.
A practical target is a uniformity ratio near 0.7 for detailed inspection areas, where local lighting guidance permits it. Strong contrast may expose defects, but excessive glare quickly causes eye fatigue. CIE guidance also stresses controlling reflected glare and uncomfortable luminance differences. Neutral, high-quality light can support color assessment, though lux alone cannot define color accuracy. I have seen inspection bays exceed 1,000 lux and still produce poor results because fixtures were badly positioned. That is the part worth questioning. Recheck readings after installing lifts, cabinets, or vehicle platforms, because each can create new shadows. Calibration records should be retained and reviewed periodically.
Maintained illuminance planning benchmarks for common vehicle inspection areas. Higher lux levels support more accurate detection of dents, scratches, leaks, paint defects, and mechanical details.
Ideal lux depends on the inspection task, not only the size of the workshop. Begin by listing each activity and its visual demand. General vehicle checks often need 300–500 lux on the floor or inspection bay. Reading labels and checking fluid levels may require around 500 lux. Paint inspection, scratch detection, and body-panel assessment usually benefit from 750–1,000 lux on vertical surfaces. Small defects need more controlled lighting.
Measure where the work happens. A ceiling reading can mislead you. Place a calibrated lux meter near the bonnet, door panel, wheel, or dashboard. Check several points, because one bright area cannot represent the whole bay.
Technicians also need balanced light without harsh reflections. High lux alone is not enough. Flicker, glare, poor colour rendering, and strong shadows can hide dents or uneven paint.
In practical inspections, I have seen a 1,000-lux bay perform worse than a softer 600-lux area. The brighter bay created reflections across glossy panels. This is where the plan needs honest review. Use adjustable fixtures, diffuse some light, and test surfaces at different viewing angles. Underbody work may need focused lighting near 500–750 lux, while fine electrical inspection can need 750 lux or more. Exact targets should follow current workplace guidance and the vehicle manufacturer’s inspection procedure. Measure again after maintenance. Dust changes results. So does fixture aging.
Vehicle inspection lighting is useful only when its lux reading represents the inspection task. The floor center is rarely enough. EN 12464-1:2021 lists 500 lux for several detailed workshop activities, while uniformity and glare also affect defect visibility. That figure is a reference, not permission to place one meter anywhere. Measure across a grid covering the hood, doors, underbody area, and workbench. Keep the sensor horizontal for surfaces viewed from above. Tilt it toward vertical panels when checking paint, dents, or reflections. Record every point.
Choose a calibrated illuminance meter following the performance principles in CIE S 023:2013 and ISO/CIE 19476:2014. A cosine-corrected sensor matters when light arrives from high-angle luminaires. Check spectral response, range, resolution, calibration date, and temperature limits before buying. Use the same meter for baseline and follow-up checks. I would not trust a single peak reading. Dust, open bay doors, and daylight can change results quickly. The IES Lighting Handbook supports task-based evaluation instead of relying on one room average. Log time, weather, luminaire status, surface orientation, and grid coordinates. Recheck after doors close. That detail is easy to miss. If readings vary sharply, inspect shadows and glare before adding lamps. More light can hide defects when reflections become harsh.
Vehicle inspection needs more than a bright lamp. It needs stable, measurable light across body panels, glass, tires, and underbody areas. EN 12464-1:2021 lists 500 lux for vehicle repair and maintenance workstations, with good color rendering requirements. For detailed defect inspection, many facilities set a higher working target, often 750 to 1,000 lux. This range helps reveal dents, paint variation, fluid traces, and tread damage. It is a practical starting point, not a universal answer.
Measure at the inspection surface, not near the ceiling. Use a calibrated, cosine-corrected lux meter, and check several points across the vehicle bay. Record the average, lowest, and highest readings. Also note the date, meter serial number, calibration status, mounting height, and operating condition. ISO/IEC 17025 calibration records improve traceability. I have seen acceptable averages hide dark corners. That mistake deserves more attention.
Tips: Create a simple grid around the vehicle. Measure the hood, doors, roof, wheels, and underbody zone separately. Keep the meter level with the inspected surface. Repeat tests after lamp replacement, layout changes, or wall repainting. Avoid direct glare from fixtures; high lux can still produce poor visibility. Review color rendering and uniformity, not lux alone. The recorded sheet should include photographs when unusual shadows appear. Retest questionable readings instead of forcing them into compliance.
Finding ideal lux is only half the inspection challenge. The real test begins when results meet the workshop floor. EN 12464-1:2021 provides 1,000-lux benchmarks for detailed inspection tasks. Use this value as a starting point, not a fixed rule. Measure lux at the vehicle surface, not only beneath the ceiling fixture. A bonnet may read 1,150 lux, while the lower door reaches only 620 lux.
Evaluate the spread across twelve or more points. Record horizontal and vertical readings, glare, shadows, and color appearance.
The Illuminating Engineering Society recommends checking uniformity because bright spots can hide surface defects. A practical target is a minimum-to-average ratio near 0.6 for consistent inspection visibility.
Results can still mislead. Glossy paint reflects the meter and creates false confidence. Adjust fixture height, beam direction, or diffusion gradually. After every change, repeat the same measurement route and inspect a dark vehicle panel under working conditions.
Tips: Clean lenses and sensors before testing. Keep a lux meter certificate available. Mark weak zones with removable floor tape. Ask two technicians to inspect the same panel independently. Their disagreement matters. It may reveal glare, poor contrast, or an overly narrow lighting target. Record readings at opening time and after warm-up, since output can shift with temperature. Cite: EN 12464-1:2021; Illuminating Engineering Society, Lighting Handbook, 11th Edition.
Around 500 lux is a basic reference for repair workstations. Detailed inspections often use 750 to 1,000 lux. The correct target depends on visibility, uniformity, and glare.
Measure at the vehicle surface, not near the ceiling. Check the hood, doors, roof, wheels, glass, workbench, and underbody area.
Create a grid around the vehicle. Use at least twelve points when possible. Mark weak areas with removable floor tape.
Keep it horizontal for upward-facing surfaces. Tilt it toward doors and other vertical panels. Match the sensor angle to the inspection surface.
Use a calibrated, cosine-corrected lux meter. Check its range, resolution, spectral response, temperature limits, and calibration date.
Record every reading, including average, lowest, and highest values. Add the date, meter serial number, calibration status, mounting height, and grid location.
A bright spot can hide a dent or paint variation. Glossy panels may reflect the sensor and create false confidence. More light is not always better.
Repeat them after lamp replacement, layout changes, wall repainting, or unusual shadows. Test after doors close and fixtures reach normal operating temperature.
Ask two technicians to inspect the same panel independently. Their disagreement may reveal glare, weak contrast, or a narrow lighting target. Review the setup again.
Determining what is the ideal lux level for vehicle inspection lighting requires matching illumination to the inspection task, surface condition, and required visual accuracy. General checks may need moderate, evenly distributed light, while identifying small scratches, paint defects, fluid leaks, component damage, or surface irregularities may require higher and more focused illumination. The inspection area should also be free from excessive glare and strong shadows so that results remain consistent.
A reliable lux meter should be selected and used at the actual working height and viewing position, with measurements taken across several points around the vehicle. Record the readings, compare the average and minimum values with the project’s inspection criteria, and identify uneven areas. If the results are too low or inconsistent, adjust fixture position, beam direction, height, or light distribution, then measure again. Regular checks and documented records help maintain stable lighting performance and support accurate, repeatable vehicle inspections.

Xolle Light