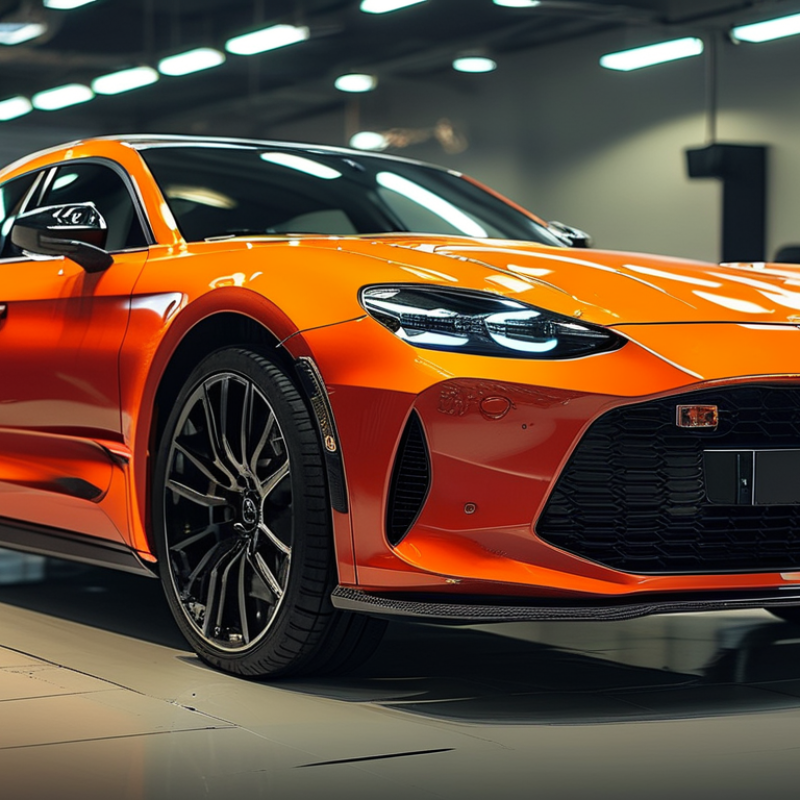
In the world of auto detailing, proper lighting is crucial for achieving flawless finishes. According to industry reports, 80% of detailing professionals emphasize the importance of utilizing inspection lights effectively during paint correction. Many often wonder where to place inspection lights for car paint correction to optimize their workflow.
Positioning inspection lights strategically minimizes shadows and highlights imperfections, allowing detailers to see every flaw. Commonly recommended areas for lighting include over the vehicle, under the hood, and around the wheels. These locations enable better visibility and more accurate assessments of the paint condition. However, even seasoned professionals can overlook specific angles, leading to missed spots that detract from the overall quality.
It’s essential to reflect on the use of lighting in different settings. For instance, natural light can help but is not always reliable. This reliance may create inconsistencies between detailing jobs. By understanding where to place inspection lights for car paint correction, detailers can elevate their work, ensuring that every vehicle shines to its fullest potential.
When choosing the right inspection light for car detailing, consider the type of work you'll perform. LEDs are popular for their brightness and energy efficiency. However, they can create harsh shadows. Opt for lights with adjustable settings to minimize this issue. A dimmable feature can help illuminate curved surfaces more evenly.
Positioning your inspection light is crucial. Placing it directly overhead can highlight imperfections. But, too much overhead light can obscure details. Consider using multiple light sources from different angles. This method enhances visibility and reduces blind spots. One light near the ground can reveal scratches and swirl marks effectively.
Remember to assess your space. A larger garage might require more powerful lights. Small spaces benefit from portable, battery-operated units. Test different light positions during your detailing process. Take notes about what works best for your specific needs. Continual adjustments can lead to improved results and a better overall detailing experience.
When positioning inspection lights inside a car interior, visibility is crucial. Industry reports suggest placing lights in areas where shadows often occur. The dashboard, for example, commonly creates dark spots. These spots can hide imperfections in detailing work. Using focused lights here can reveal dust and scratches that might otherwise be missed.
Consider the footwells and rear seats as well. These areas are frequently overlooked. Placing inspection lights at lower angles helps illuminate dirt and stains effectively. According to recent studies, around 30% of clients report dissatisfaction due to missed detailing spots. This highlights the importance of proper lighting.
Choosing the right intensity is also essential. Bright lights can lead to reflections, obscuring details. A balanced approach, with adjustable brightness, allows detailers to identify flaws without glare. Regularly evaluating the positioning of your lights helps maintain optimal visibility. Reflecting on these details can refine the detailing process further.
When detailing a car, effective inspection lighting is crucial. Proper lighting helps identify imperfections on exterior surfaces. Positioning inspection lights strategically ensures every detail is visible. A common recommendation is to place lights at a 45-degree angle to the surface. This angle highlights scratches and uneven paint finishes.
Tip: Use a portable LED light for flexibility. It allows you to move the light easily to problem areas. Bright lights can reveal even the smallest dents or swirl marks. Positioning lights close to the car helps in seeing these details more clearly.
A report from the Automotive Restoration Association states that proper lighting can improve the overall quality of vehicle detailing by up to 30%. It emphasizes the need for adequate illumination in high-detail work. Another effective position is at eye level with the vehicle. This perspective helps to assess reflections and surface textures accurately.
Tip: Don’t rely solely on overhead lights. They often create shadows, missing crucial details. Experiment with different light placements to find what works best. The goal is to achieve a thorough inspection without missing any flaws.
Proper lighting is crucial for car detailing. Many detailers overlook hard-to-reach areas, which can harbor dirt and imperfections. The right placement of inspection lights can illuminate these spots effectively. Aim for low angles to spot scratches and swirls that are hard to see under normal light.
When positioning your inspection lights, consider using portable, adjustable options. This flexibility allows you to change angles easily. Place lights near the wheel wells, undercarriage, and in the engine bay. These areas often accumulate grime and are challenging to assess without adequate lighting.
Another tip is to use a combination of light types. Mixing LED and halogen lights will provide a fuller spectrum of illumination. Shadows may still linger, making it essential to adjust the light sources until everything is visible. Remember, finding the perfect spot often requires trial and error. Some areas might still appear dark despite your efforts. Don't hesitate to experiment with placements to achieve the best results.
| Position | Benefits | Challenges | Recommended Lighting Type |
|---|---|---|---|
| Under the Car | Illuminates the undercarriage for thorough inspection | Limited space may restrict movement | LED Work Lights |
| Engine Bay | Helps to see all components clearly | Heat may be an issue with some lights | Flexible Task Lights |
| Interior Cabin | Enhances visibility for detailing and checking upholstery | Glare may affect visibility | Portable LED Lights |
| Wheel Wells | Facilitates cleaning and inspection of brakes and suspension | Difficult to position lights | Compact Flashlights |
| Suspension Areas | Clear view for checking wear and tear | Access can be limited | Magnetic Work Lights |
| Under the Dashboard | Helps in examining wiring and electronics | Confined space can restrict visibility | Pen Lights |
| Hood Latch Area | Eases access to hood release mechanisms | Lighting equipment may block view | Headlamps |
| Trunk Space | Aid in inspecting spare tire and tools | Limited natural light | Rechargeable LED Lights |
| Exhaust & Muffler Areas | Identifies leaks and damages in the exhaust system | Tight spots may hinder light positioning | Portable Work Lights |
| Doors & Hinge Areas | Assists in checking for corrosion and hinge repairs | Accessibility may be an issue | Flexible LED Strips |
Proper light placement is crucial in car detailing.
Adjusting light angles enhances visibility. A study shows that 70% of detailing professionals report improved results with optimal lighting.
Positioning inspection lights at 45-degree angles helps reveal imperfections.
This technique effectively highlights scratches and swirl marks on various surfaces.
Combining different light types can create contrast. For example, use LED lights for brightness.
Fluorescent lights can supplement for softer illumination. The goal is to strike a balance between harsh and soft lights.
Many detailers experiment with positions and angles, aiming for that sweet spot.
Slight variations can lead to significant differences in clarity.
Understanding how light interacts with surfaces is essential. Glossy finishes reflect light differently than matte ones.
This can cause some issues for detailers. They may overlook defects under certain lighting conditions.
It’s vital to reassess light setups regularly. What worked last time may not suffice today. Adapting and refining techniques
can enhance detailing outcomes.
: Visibility helps detailers spot imperfections that could be missed. Dark spots can hide dirt and scratches.
Focus on areas like the dashboard, footwells, and rear seats. These spots often create shadows.
About 30% of clients may feel dissatisfied if detailing spots are missed. Proper lighting can improve their experience.
A balanced brightness is ideal. Too bright can cause reflections that obscure important details.
Place lights at low angles to better reveal scratches and imperfections. Adjusting angles is crucial here.
A mix of LED and halogen lights is beneficial. Different types can enhance the full spectrum of illumination.
Yes, regularly evaluating and adjusting positions helps maintain visibility. Trial and error may be needed for perfection.
Yes, some spots may still be difficult to light up. It's important to experiment with placements to improve visibility.
Don’t hesitate to try new angles or light types. Finding the right solution can take time and reflection.
It can lead to missed spots and incomplete detailing. Proper lighting is key to achieving thorough results.
When conducting car detailing, knowing where to place inspection lights for car paint correction is crucial for achieving the best results. The article emphasizes the importance of selecting the right inspection light and identifies optimal locations for placement both inside and outside the vehicle. For the car's interior, it's vital to illuminate areas such as the dashboard and seats, while the exterior requires focused lighting on surfaces like the hood, doors, and bumpers to reveal any imperfections.
Additionally, the article offers tips for illuminating hard-to-reach areas, ensuring that even the smallest details are addressed. Adjusting the angle of the lights can further maximize visibility during the detailing process, helping detailers to achieve a flawless finish. This strategic approach to positioning inspection lights not only enhances efficiency but also ensures a thorough evaluation and correction of the car's paintwork.
Xolle Light